Meteorological environment monitoring equipment supplier
Insist on doing high-precision customer favorite technology products

one.How Chlorophyll Sensor works
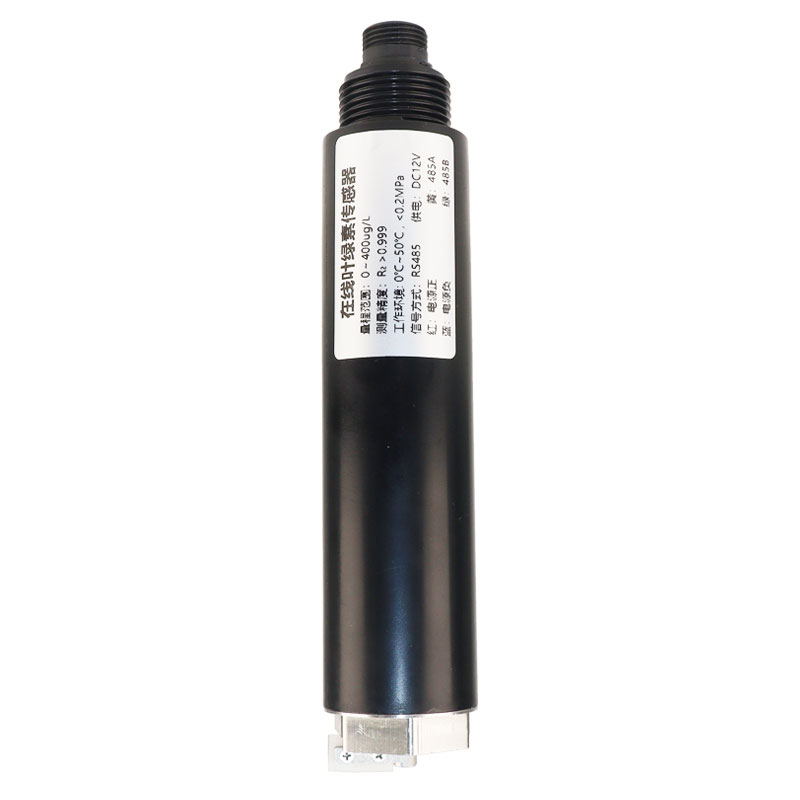
The Chlorophyll Sensor uses fluorescence analysis to monitor chlorophyll content to determine relative chlorophyll, which can be monitored online in situ for a long time.Chlorophyll Sensor is a device specially used to detect chlorophyll content.Its working principle is based on the fluorescence and light absorption properties of chlorophyll.
When illuminated by natural light or a light source of a specific wavelength, chlorophyll absorbs light energy and emits fluorescence.The intensity of this fluorescence is proportional to the chlorophyll content, so the chlorophyll content can be estimated by detecting the intensity of the fluorescence.
The advantage of Chlorophyll Sensor is that it can measure chlorophyll content in real time, quickly and non-destructively, and can be used for research, investigation and monitoring of rivers, lakes, ponds, marine surveys, aquaculture, drinking water sources, algae and phytoplankton conditions.
two.Chlorophyll Sensor technical parameters
| Measurement principle | Fluorescence method |
| Measuring range | 0-400ug/L |
| resolution | 0.01ug/L |
| Accuracy | R2>0.999 |
| temperature compensation | Automatic temperature compensation |
| Self-cleaning function | Equipped with an automatic cleaner to prevent biological adhesion and light window pollution to ensure long-term monitoring stability; the automatic cleaning time and cleaning frequency can be set, and the power consumption is 0.7W |
| Output mode | RS-485 (ModbusRTU protocol) |
| Storage temperature | -5℃~65℃ |
| working environment | 0℃~50℃,<0.2MPa |
| Installation method | Submersible installation, 3/4NPT mounting thread |
| Cable length | 5m |
| Power consumption | 0.4W,12V power supply |
| powered by | DC: 12V~24V |
| Protection level | IP68 |
| Calibration method | Two point calibration |
| Shell material | 316L stainless steel |
three.Chlorophyll Sensor Dimensions/Installation
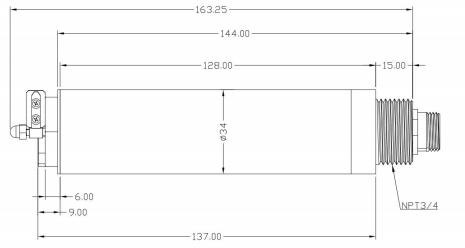
1.Chlorophyll Sensor size chart

2.Wiring diagram
The cable is a 4-core shielded wire:
Red wire—power wire (12~24V) black wire—ground wire (GND)
Green line—485B Yellow line—485A
3.Installation
1) On site, according to the actual situation, you can choose 6 points (3/4 NPT) thread for fixed installation or
Mounting accessory bracket installation, or other installation method that can fix the sensor.
2) Fixed installation is preferred, drag chain installation is prohibited.
3) When installing, fully consider the water flow and liquid level changes to ensure that the water flow can cross the optical path and the sensor is 10cm or deeper underwater.
4) Installation distance requirements: keep more than 3cm from the side wall and more than 10cm from the bottom.
Four.Chlorophyll Sensor care and maintenance
1.Maintenance schedule
Maintenance project maintenance time notes
Clean the sensor 0.5 to 3 days (without brush) 4 to 8 weeks (with brush)
Sensor inspection 6 months
Replace O-rings every 1 to 2 years
2.Maintenance methods
1) Check the outer surface of the sensor.Rinse the outer surface of the sensor with clean water.If there is still dirt remaining, please wipe it with a damp soft cloth.For some stubborn dirt, you can add some household detergent to the water to clean it.
2) Check the sensor cable and check whether the cable sheath is broken.The cable should not be tight during normal operation.
3) Check the measurement window to see if there is any dirt and wipe it with a dust-free cloth.
4) Sensor calibration can be calibrated through the host computer software, or it can be calibrated by yourself.
RS-485 sends MODBUS commands to self-calibrate.
3.Sensor calibration
3.1 Zero point calibration
Use a brown beaker to measure an appropriate amount of distilled water, place the sensor vertically in the solution, with the front end of the sensor at least 10cm away from the bottom of the beaker, and wait for 3 to 5 minutes for the value to stabilize before performing zero point calibration.
3.2 Slope calibration
Place the sensor in the standard solution, with the front end of the sensor at least 10cm away from the bottom of the beaker, and wait for 3 to 5 minutes for the value to stabilize before performing slope calibration.